Well, I have decided that I shall be doing a weekly blog on what we're up to, new tutus, how our week has been etc. A bit of a tutu diary you could say! We're still in the early stages of our business so hopefully we can look back at some blog posts in a few years and remember the good old days!
We actually have staff now! Can you believe it? Our admin assistant started last week doing emails and phone calls, etc and we have a new machinist starting tomorrow. This should hopefully start freeing me up to add new products to the website, keep it maintained, work on new samples and more! Seems like we're getting busier and busier every week and as mental as it is right now and as exhausted as we are from working from 6am until 10pm at night I hope it continues. And now we have staff perhaps we might get a real lunch break here and there!
So... have a peek at some new tutus we've created over the past few weeks. These aren't on the website yet. Some may be added in the future while others may not. If you've found this blog by accident and want one of the tutus below just send us a message here
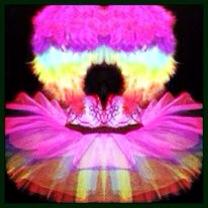
This is our Daisy Days tutu set. Funky sunshine yellow cascade tutu with daisy detail on the front, matching plunge bra with matching daisy and festival daisy headband. Great for festivals, EDC and EDM outfits! Such a summery outfit!
.JPG) |
| Sunshine Tutu Set Daisy Costume |
This is our cascade tutu with 6 foam roses on the front. Great for an 'outside the box' Alice in wonderland costume!
.JPG) |
| rose tutu alice in wonderland costume |

We made a children's Alice in Wonderland tutu for a special party. Was in a rara style tutu with black ribbon trim edges, matching black bow and white net apron on the front with casino suit sequin detail
.JPG) |
| Alice in Wonderland Tutu Skirt |
A different take on a Minnie Mouse tutu. Made in red sparkle net with black sparkle bow and frill trim. Polka dots are made of our white 'Angel' glitter fabric. So sparkly in real life!
.JPG) |
| Minnie Mouse Tutu Retro Style |
We're currently having a play with some new Minnie ears ideas. These are some Sailor Minnie ears for any nautical nights out. Cute little anchor details in royal blue glitter fabric and a cute red vintage look hair bow. We're also doing some in stripes for a sailor theme as well as some leopard minnie ears. Photos will be up soon as the leopard ones look awesome!
.JPG) |
| Sailor Minnie Mouse Ears |
.JPG) |
| Nautical Minnie Mouse Ears Below are our Minnie ears in the 'Angel' glitter fabric with a white sparkle hair bow and a straight veil. Some people are preferring this straight veil to our cascade veil. Perfect for a girl who loves Disney but doesn't want anything too fussy! |
.JPG) |
| Bridal Minnie Mouse Ears |
.JPG) |
| Minnie Mouse Veil |
We were asked to make a custom bridal set with light up veil but it was also her 30th birthday. We love making custom tutus and tutu sets so we accepted the challenge! All the tiaras with ages on were quite expensive so I decided we could add the 30 ourselves with our glitter fabric like the Minnie Ears above and it worked out even better than we expected! The glitter fabric is so sparkly in real and photos don't really show how pretty it is. The tiara was also super glittery and with the white sparkle net mixed with neon pink net and LED lights it looked gorgeous!
.JPG) |
| Hen Night Veil 30 Birthday Veil |
.JPG) |
| Light Up Hen Night Veil |